I'm all for optimization when it comes to doing makeup. That's why I really like to have my eyebrows in shape with minimal daily effort. Just one swipe of an eyebrow gel and we're done!
To achieve this goal, a year ago I started doing eyebrow lamination. Today's a story and walkthrough of this procedure.
Above is a picture of before and after to get you more excited to read on!
What is eyebrow lamination?
Eyebrow lamination is a procedure of giving eyebrows a long-term shape by giving them a chemical treatment. After everything is done, the eyebrows become easily manageable for about 8 weeks.
The process consists of three main steps:
- applying the lifting cream
- brushing the eyebrows into the desired shape and applying a neutralizer
- applying the regenerating cream with argan oil and letting eyebrows recover for 24 hours
If needed, an extra step of tinting the eyebrows can happen between steps 2 and 3.
The whole procedure takes about 45 minutes in a salon, but since I'm doing it myself at home (and even taking pictures of each step this time), it takes about an hour for me.
The products
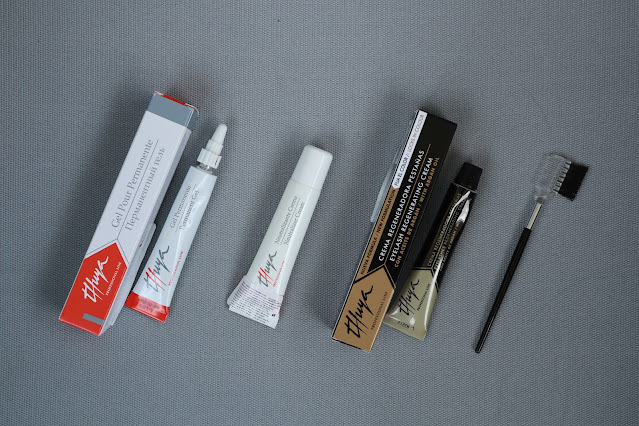
For 3 lamination steps, I have purchased a Thuya eyebrow lamination kit on Anpro, as well as some stretch film (we'll need it for steps 1 and 2).
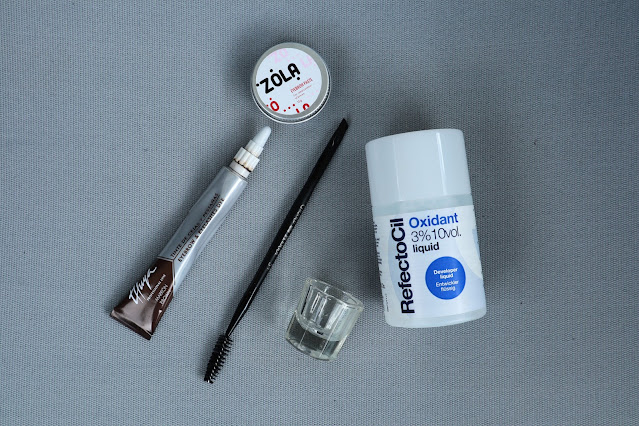
For eyebrow tinting, I will use Thuya eyebrow tint in shade Marron Brown, as well as Refectocil 3% oxidant. For drawing out a shape, I will use Zola eyebrow paste.
Additionally, you'll need some micellar water, several Q-tips, a few cotton pads, and tweezers.
The process
Before doing this at home, I had this procedure done by a professional brow artist several times. I was pretty happy with their work but started to DIY during the lockdown. Now that I have a full set of products that allegedly will last for 60 procedures, I'm going to DIY for a very long time :)
Before I began, I've laid out all the products on a surface to have them easily accessible and made sure I will not be interrupted while I'm in the process.
The permanent gel used for step 1 has a really strong smell, so stay in a place with access to fresh air.
After that is taken care of, let's get started!
0. Cleansing
Before starting any eyebrow procedure, we need to clear the eyebrows from any makeup or sebum. I've applied micellar water onto a cotton pad and cleaned the eyebrows, then pat them with a dry cotton pad. Make sure your eyebrows are dry before proceeding any further!
1. Permanent gel
I took a mascara brush and applied the permanent gel onto the eyebrows. Each and every hair needs to be covered with the permanent gel, as this is when we're making hair flexible and ready for the next fixation.
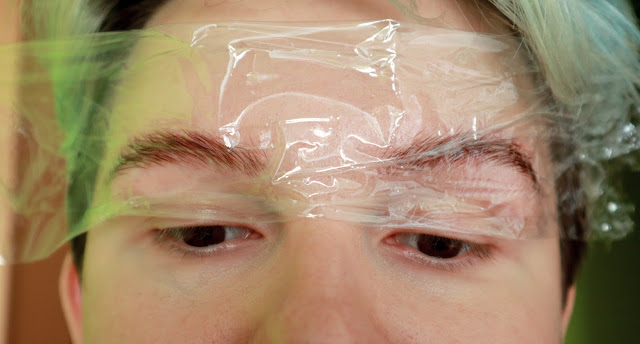
After applying the gel, I covered the eyebrows with a stretch film and left it for 10 minutes. Depending on the thickness of the hair, hold time can be up extended, but should not be more than 15 minutes. The instruction says to brush the eyebrows every 2-3 minutes as you wait, so I brushed the hairs 3 times during those 10 minutes.
Be mindful that this gel might burn your skin, and that the manufacturer recommends to take it off if you feel any discomfort.
After the time of permanent gel was finished, I took a dry Q-tip and removed the gel from the brows. It's important not to use water during this step, or it will ruin the process.
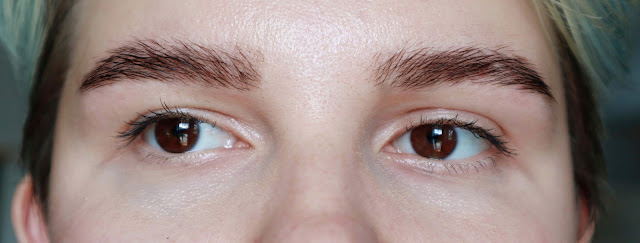
Here's how my eyebrows looked after step 1.
2. Cream neutralizer
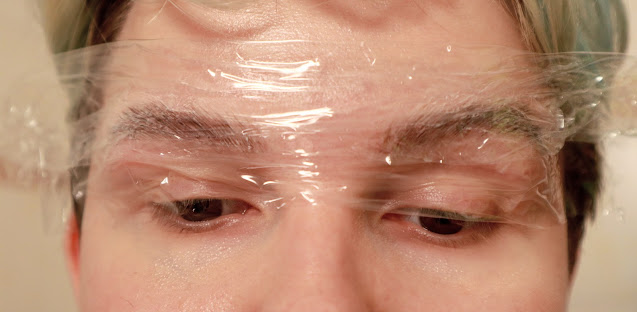
As a next step, I applied a cream neutralizer with another brush and gave the eyebrows the desired shape. Then I covered the brows with a clean film again and let it do it's magic for 10 minutes. The cream has to stay on the eyebrows for 10 to 15 minutes.
These are my eyebrows with cream on...
... and this is how they looked after I removed it with a wet cotton pad. They looked more ginger in the mirror.
2 1/2. Tinting and shaping (plucking)
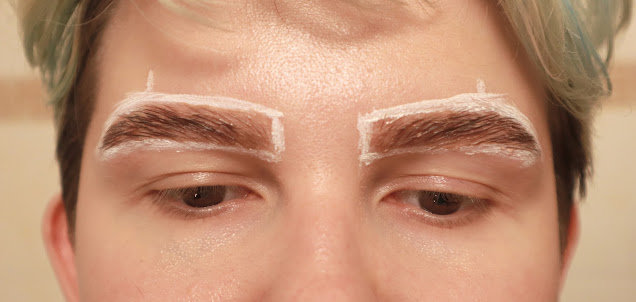
As my eyebrows have lost some pigment after applying the permanent gel, I decided to tint my eyebrows this time. I mixed Thuya tint with an oxidant in an approximately 1:1 ratio, drew the desired shape of eyebrows with white eyebrow paste, and applied the mixture onto the eyebrows. For a better look, it's best to apply the tinting mixture onto the tails first, and leave the brow head for later. This will give a nice ombre look, and brow heads will not look over-tinted.
As this tint is getting too dark for my hair if leave for too long, I held it only for 5 minutes. I also used tweezers to remove any hairs there were not fitting into the shape I wanted. Here's a result!
3. Regenerating cream with argan oil
The final step is to let the eyebrows recover from all the damage the hairs have suffered from previous steps. Using a mascara brush, I applied the product onto my eyebrows and again gave them the desired form.
I'll have to keep the eyebrows away from water for 24 hours after this last step. I'm not exactly sure why, but my eyebrow master says this helps the lamination last longer in the long run, and I believe her!
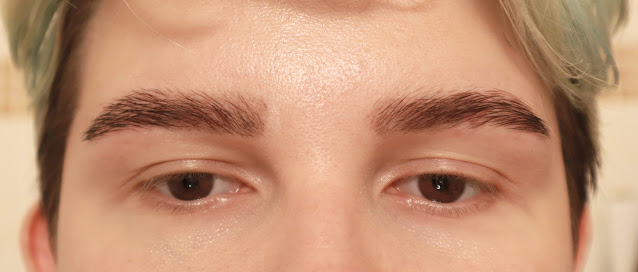
So for the next 24 hours, I'll be walking with my eyebrows pretty much glued to the skin, but it is worth it! This is how it looks.
Results
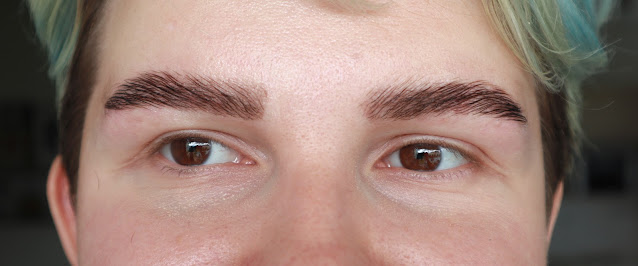
After 24 hours have passed, I was finally able to touch the eyebrows and comb them with a brush. For the next 2 months, brows will be the quickest part of my makeup routine.
Here's how they look without any products applied.
The whole procedure is pretty easy to follow, though it's easy to mix up the products of steps 1 and 2 because of similar packaging. It took me 1 hour to get everything done — not bad for a second time doing this! I am happy with the results and will do the next round of lamination in 2 months. Thanks for reading, and let me know what you think in the comments!




Komentáře
Okomentovat